Nuphy Air 75V2 刷固件
可能是运气不好吧,买的Nuphy Air 75V2键盘拿到手后,2.4G接收器,死活链接不上。
蓝牙连接倒是正常,但是蓝牙在之前的键盘上面,运行都不稳定,也不知道是之前键盘的原因还是主机的原因。
那就必须修复一下这个问题了,不能忍。
首先,询问客服之后,尝试重置,换主机,换MAC,都连不上,差点送回去保修了。不过还是先尝试自己修复一下,我的这个在刷写完成新的固件之后,一切正常。好使。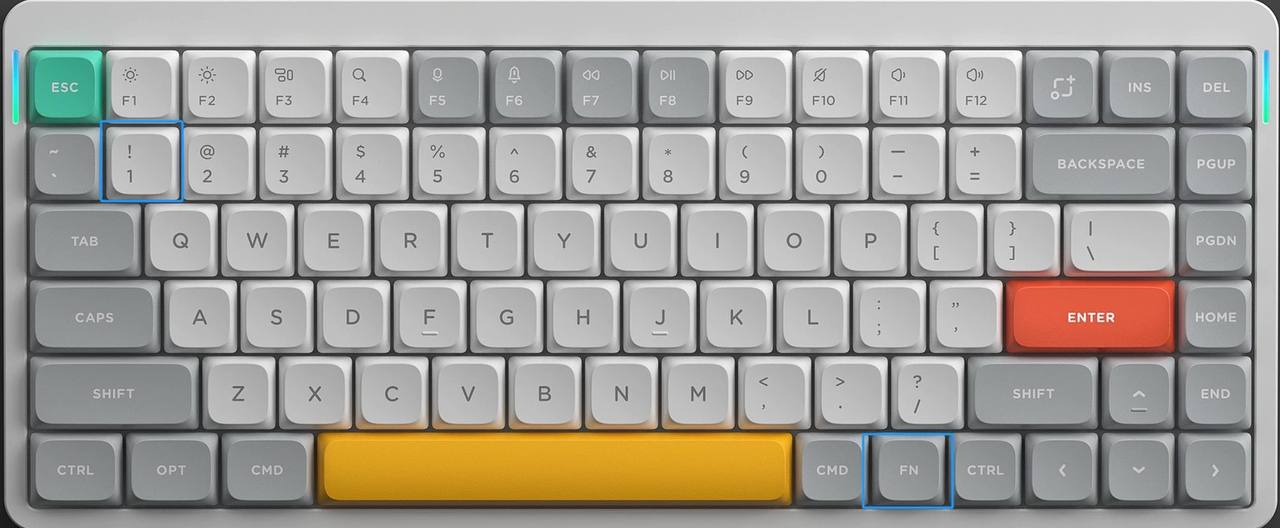
Nuphy键盘基本使用指南
2.4G接收器链接
- 拔下接收器
先将接收器从电脑上拔下来。 - 打开无线按钮
点击设备右上角的无线按钮,将其开启。 配对操作
长按 FN + 4 键,直到左侧的呼吸灯变为绿色快速闪烁状态,然后立即将接收器插入电脑。
异常处理
插入之后还是在闪烁的话就快速的插拔一下接收器或者换USB端口再试一次
蓝牙键盘配对步骤:
- 打开无线功能
在设备右上角打开无线按钮。 - 启动配对模式
首次配对时,长按 FN + 字母区上方的数字 1 键,按住 5 秒以上,进入搜索配对模式。 - 确认指示灯状态
蓝灯快速闪烁,表示设备正在搜索蓝牙连接。 - 连接蓝牙设备
在电脑或手机的蓝牙设置中,查找并连接键盘名称,完成配对即可使用。
恢复出厂设置
fn+【 长按三秒以上灯闪就是恢复出厂成功
找到官网固件
找到我的Air75 V2部分:
截止目前,最新的是2.1.5版本。

点击 [Version 2.1.5] 可以跳转到 详情
注意:此更新包含3个固件文件,必须全部安装。安装完成后必须重新配对
注意:此更新包含3个固件文件,必须全部安装。安装完成后必须重新配对
注意:此更新包含3个固件文件,必须全部安装。安装完成后必须重新配对

每一项,都有更新说明
刷写键盘固件
官方更新说明
- 访问 https://github.com/qmk/qmk_toolbox/releases 下载 QMK Toolbox 的官方版本,如果您之前未安装过。
- 在发布页面,确保选择适合您操作系统的安装文件,或下载源码自行编译。
- 从 NuPhy 固件页面下载计划刷入键盘的固件,确认所下载的固件与您的键盘型号匹配后再继续。
- 启动 QMK Toolbox,通过“文件”菜单中的“打开”对话框找到固件文件(以 .bin 结尾)。
- 将键盘设置为有线模式,然后按住“Esc”键,同时使用包装内附带的数据线将键盘连接到主机,当控制台窗口出现如下截图中的黄色文字时松开按键。注意:以上操作必须严格按照指示顺序和方式进行,如果您的键盘已连接,请先拔掉再开始此过程。
- 在点击“Flash”按钮前,再次核对固件文件的完整性和正确性(哈希值在下载页面提供),然后等待控制台窗口显示“Flash Complete”。请勿中断刷写过程,并保持有线连接状态。
- 输入几个字符以验证刷写是否成功。

刷写键盘无线模块固件
我这里只翻译了iPhone的操作指南,如果你是安卓手机,其实过程差不多的。
都是下载固件,然后手机下载NRF Connect这个软件,链接到键盘之后,进入DFU模式,选择固件,开始刷写固件,刷写完成后,关闭键盘再重新打开。
Instructions on Flashing the RF Firmwares
Note: this guide provides instructions on flashing/upgrading the firmware on a Nordic nRF wireless chip equipped NuPhy keyboard through Bluetooth, for the purpose of which an iOS/Android mobile phone device is required to use the official nRF Connect for Mobile App. Desktop versions of nRF Connect are available but have not been tested yet.
If you're an iPhone user
Save the compressed firmware NUPHY_RF_OTA_Vx.x.x.zip(where x.x.x is the firmware version) to your mobile phone’s filesystem, preferably in a location where it is easy to find.
将压缩固件 NUPHY_RF_OTA_Vx.x.x.zip(其中 x.x.x 是固件版本)保存到您的手机文件系统中,最好放在一个容易找到的位置。
Install the nRF Connect for Mobile App through app store. Once the installation is successful, tap to open nRF Connect, the following main screen should be displayed. Make sure it stays on your phone’s display before starting the next step.
通过应用商店安装 nRF Connect for Mobile 应用。安装成功后,点击打开 nRF Connect,应该会显示以下主界面。请确保在开始下一步之前,该界面保持在手机屏幕上。
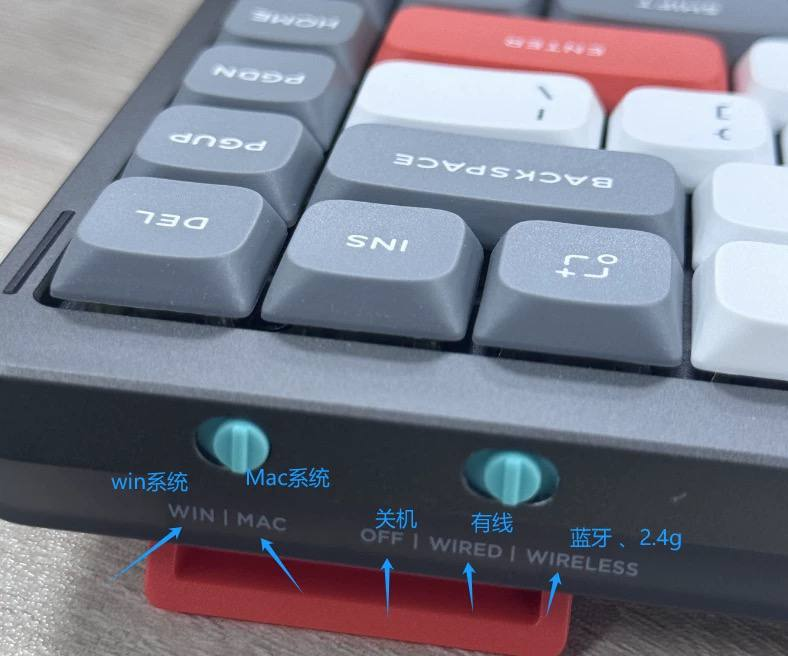
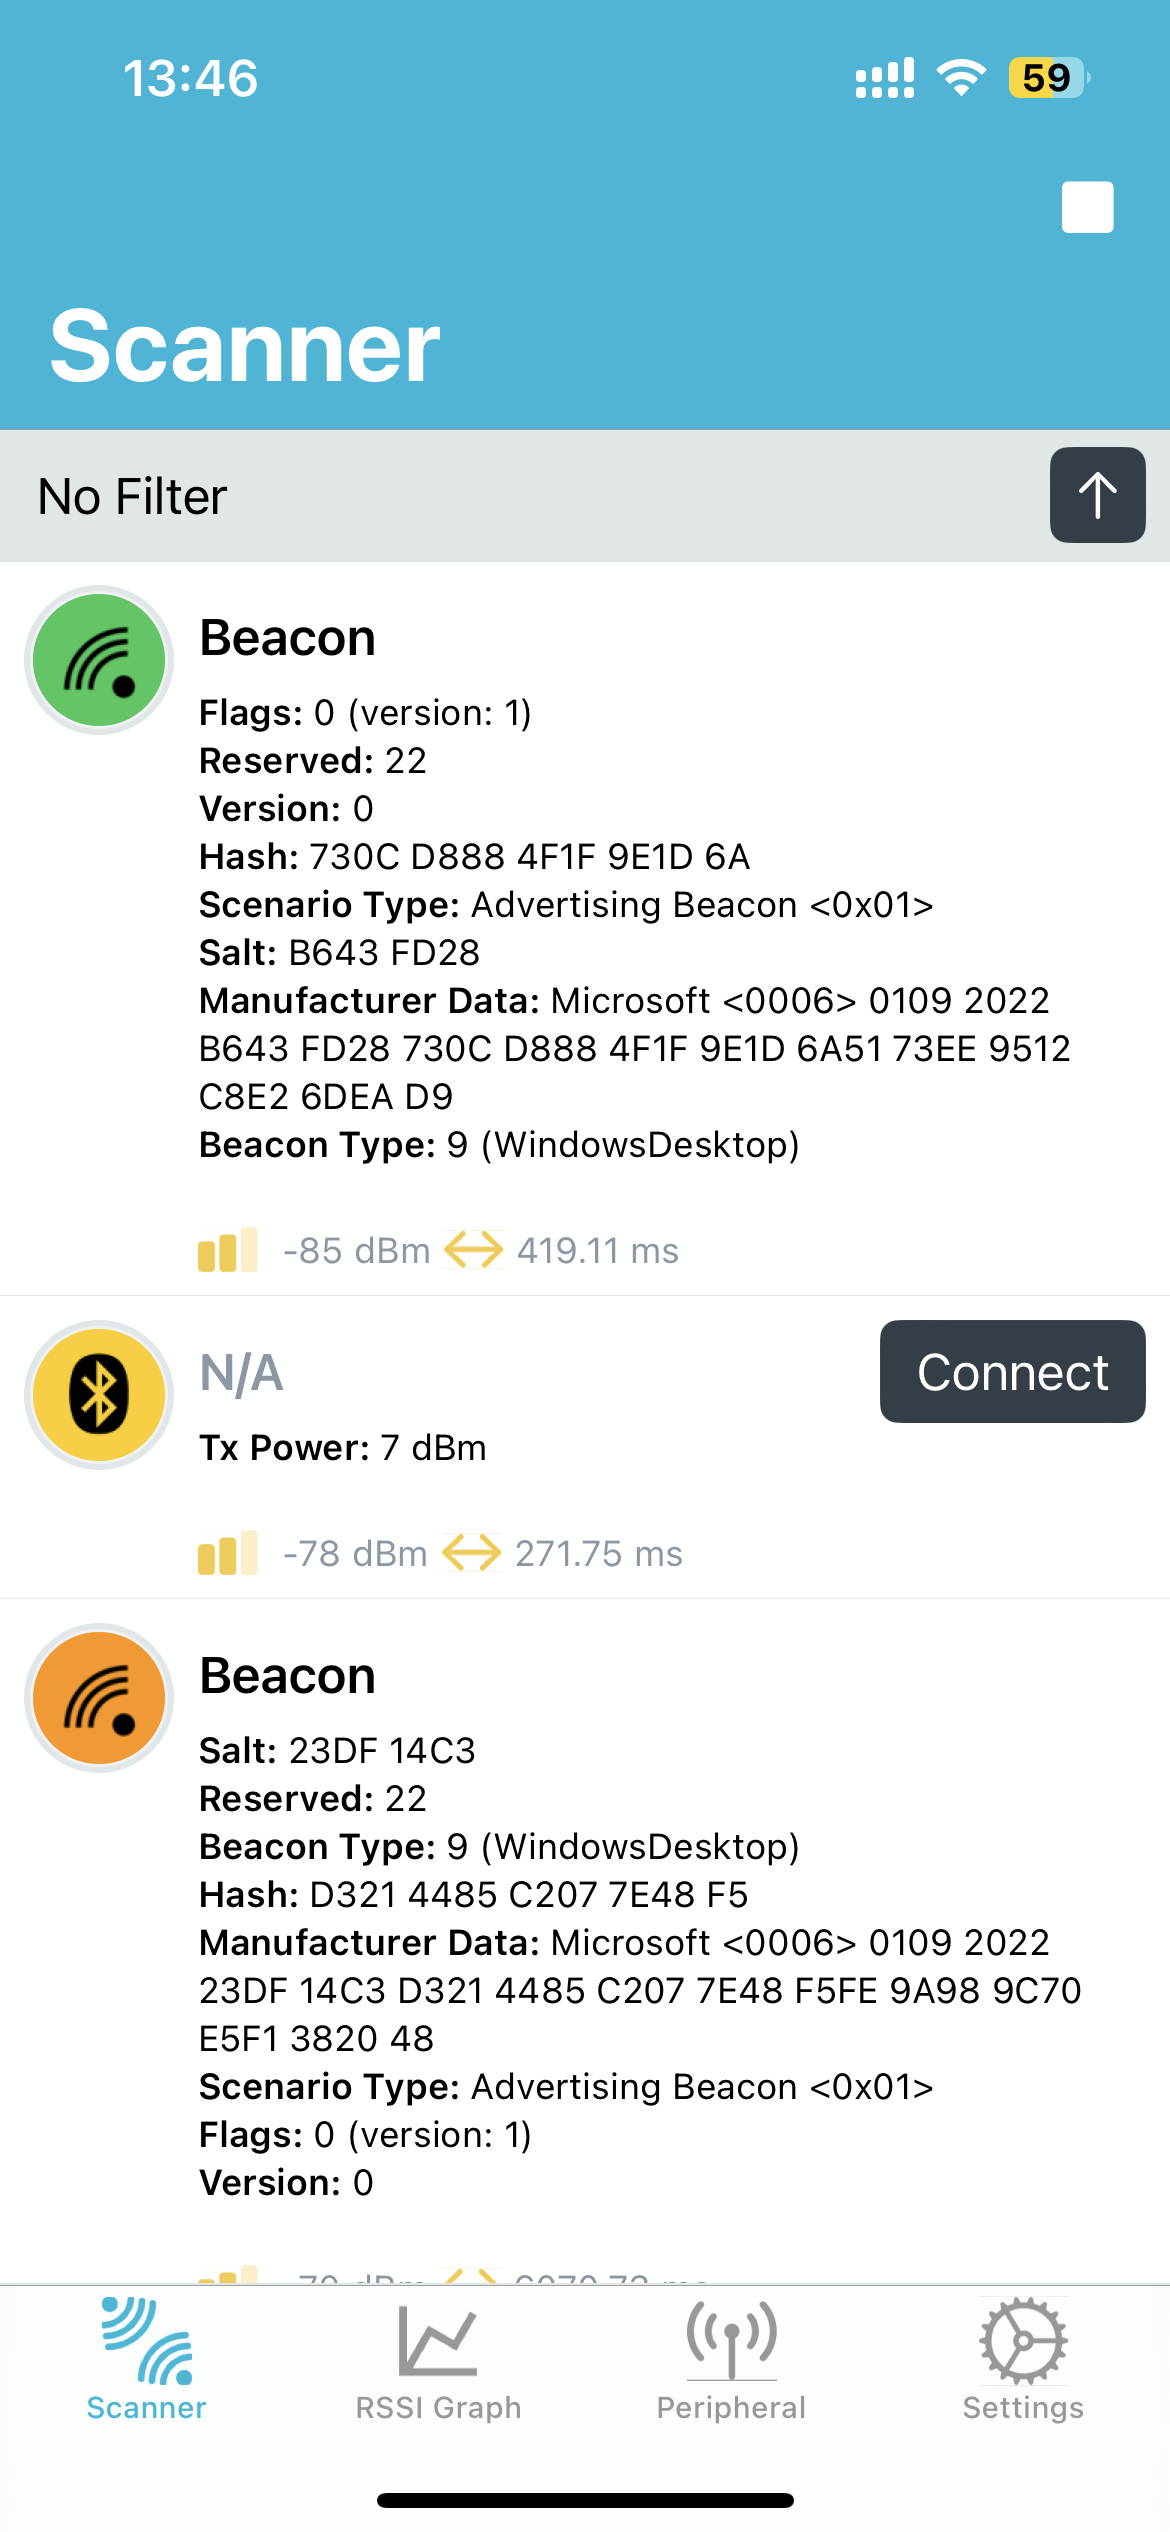
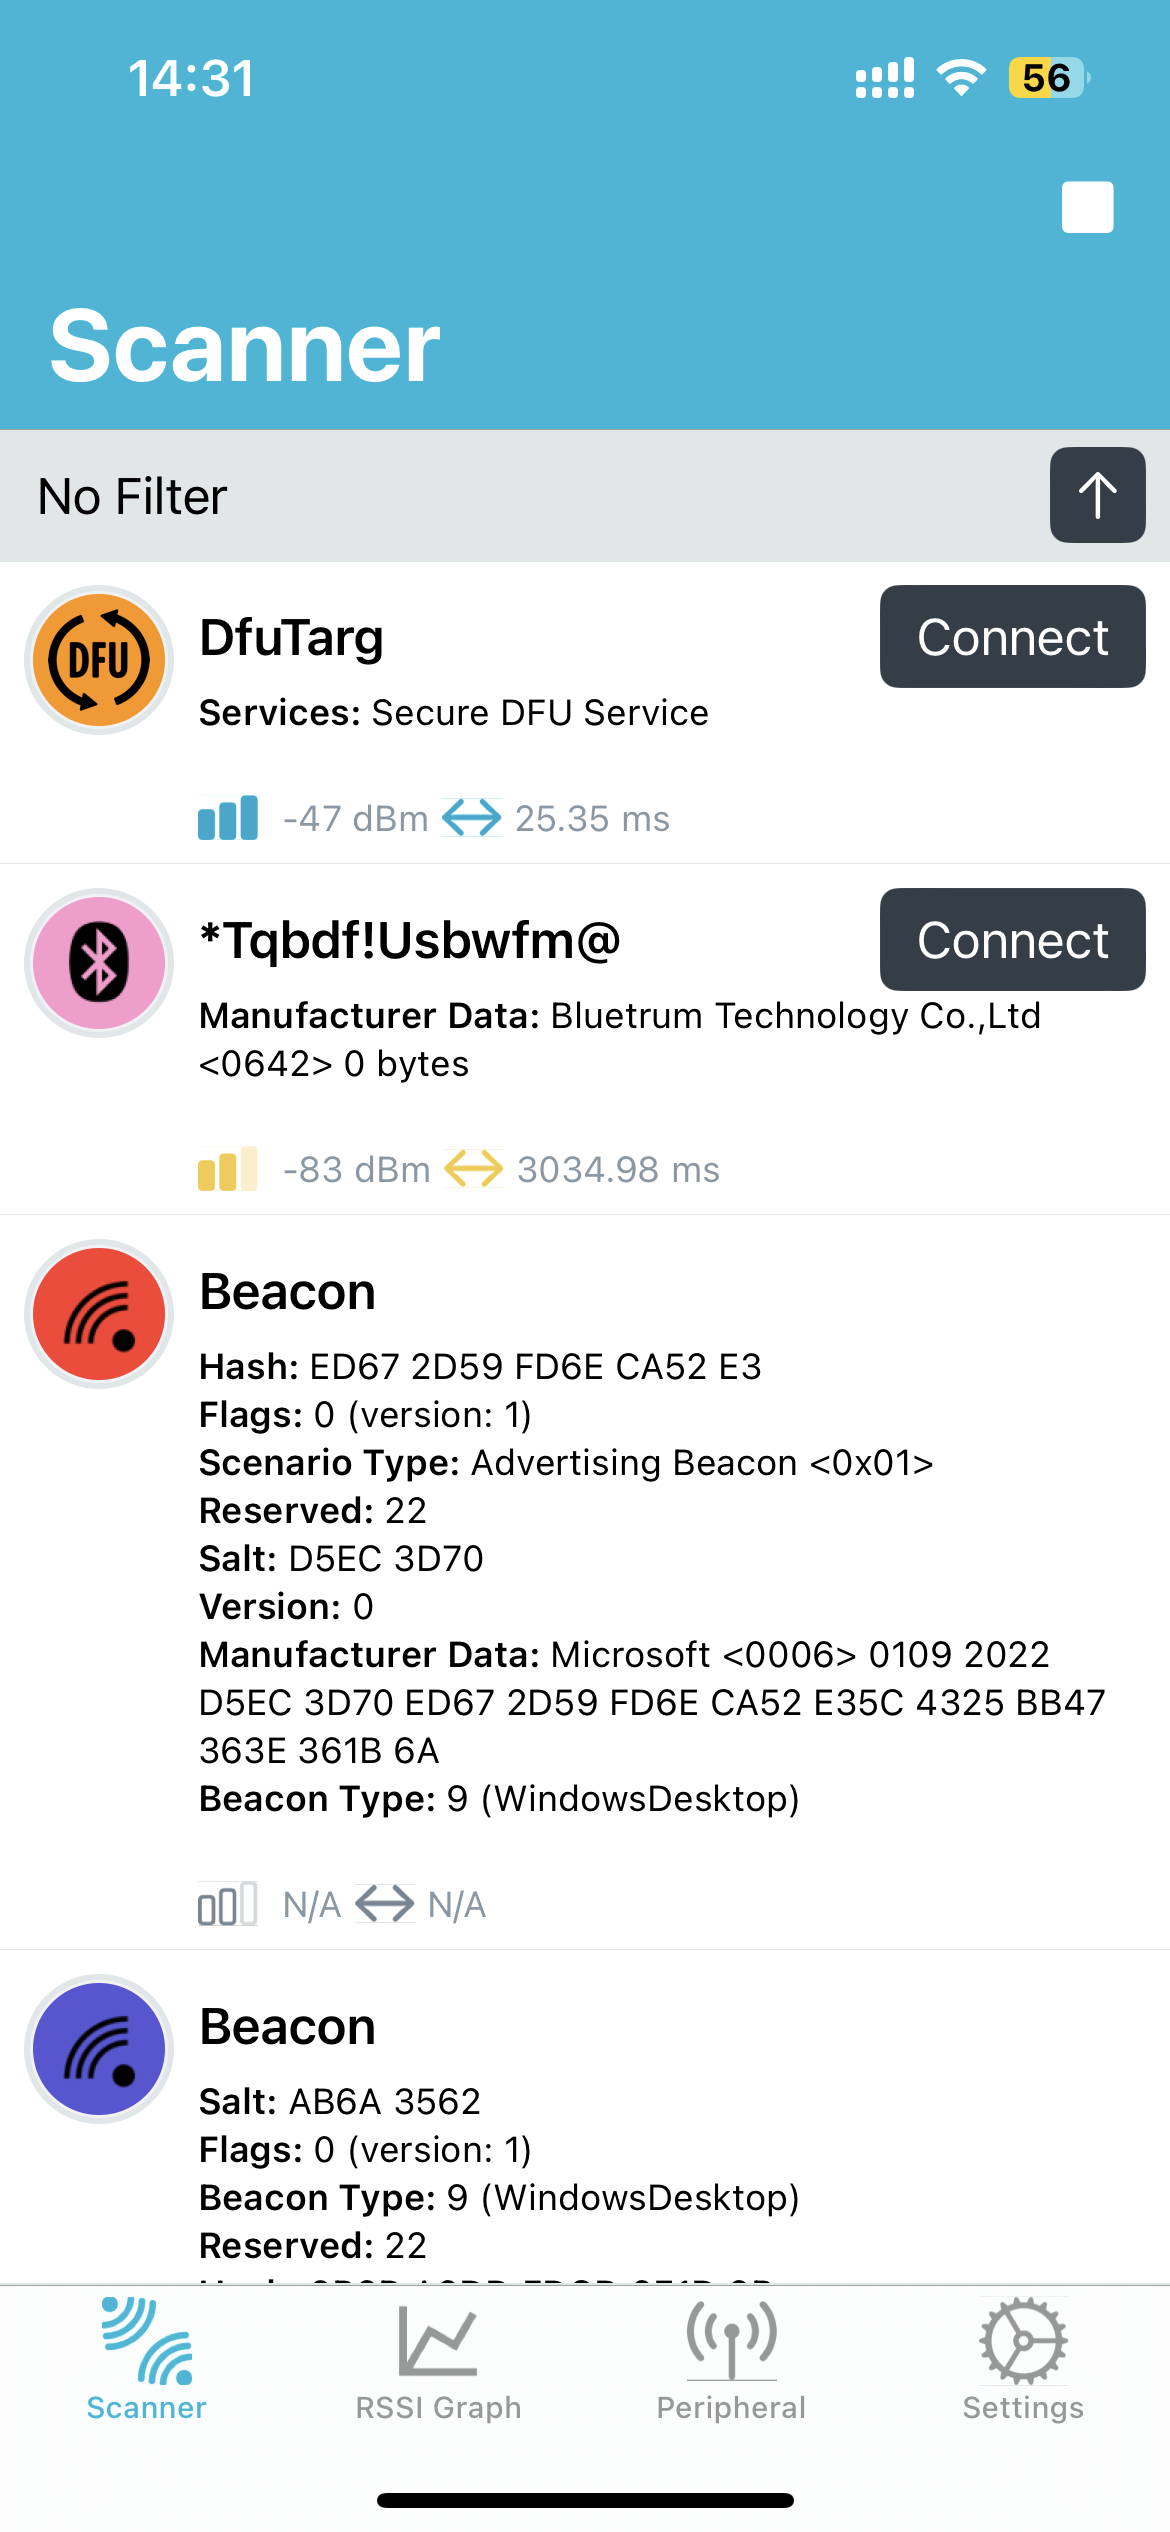
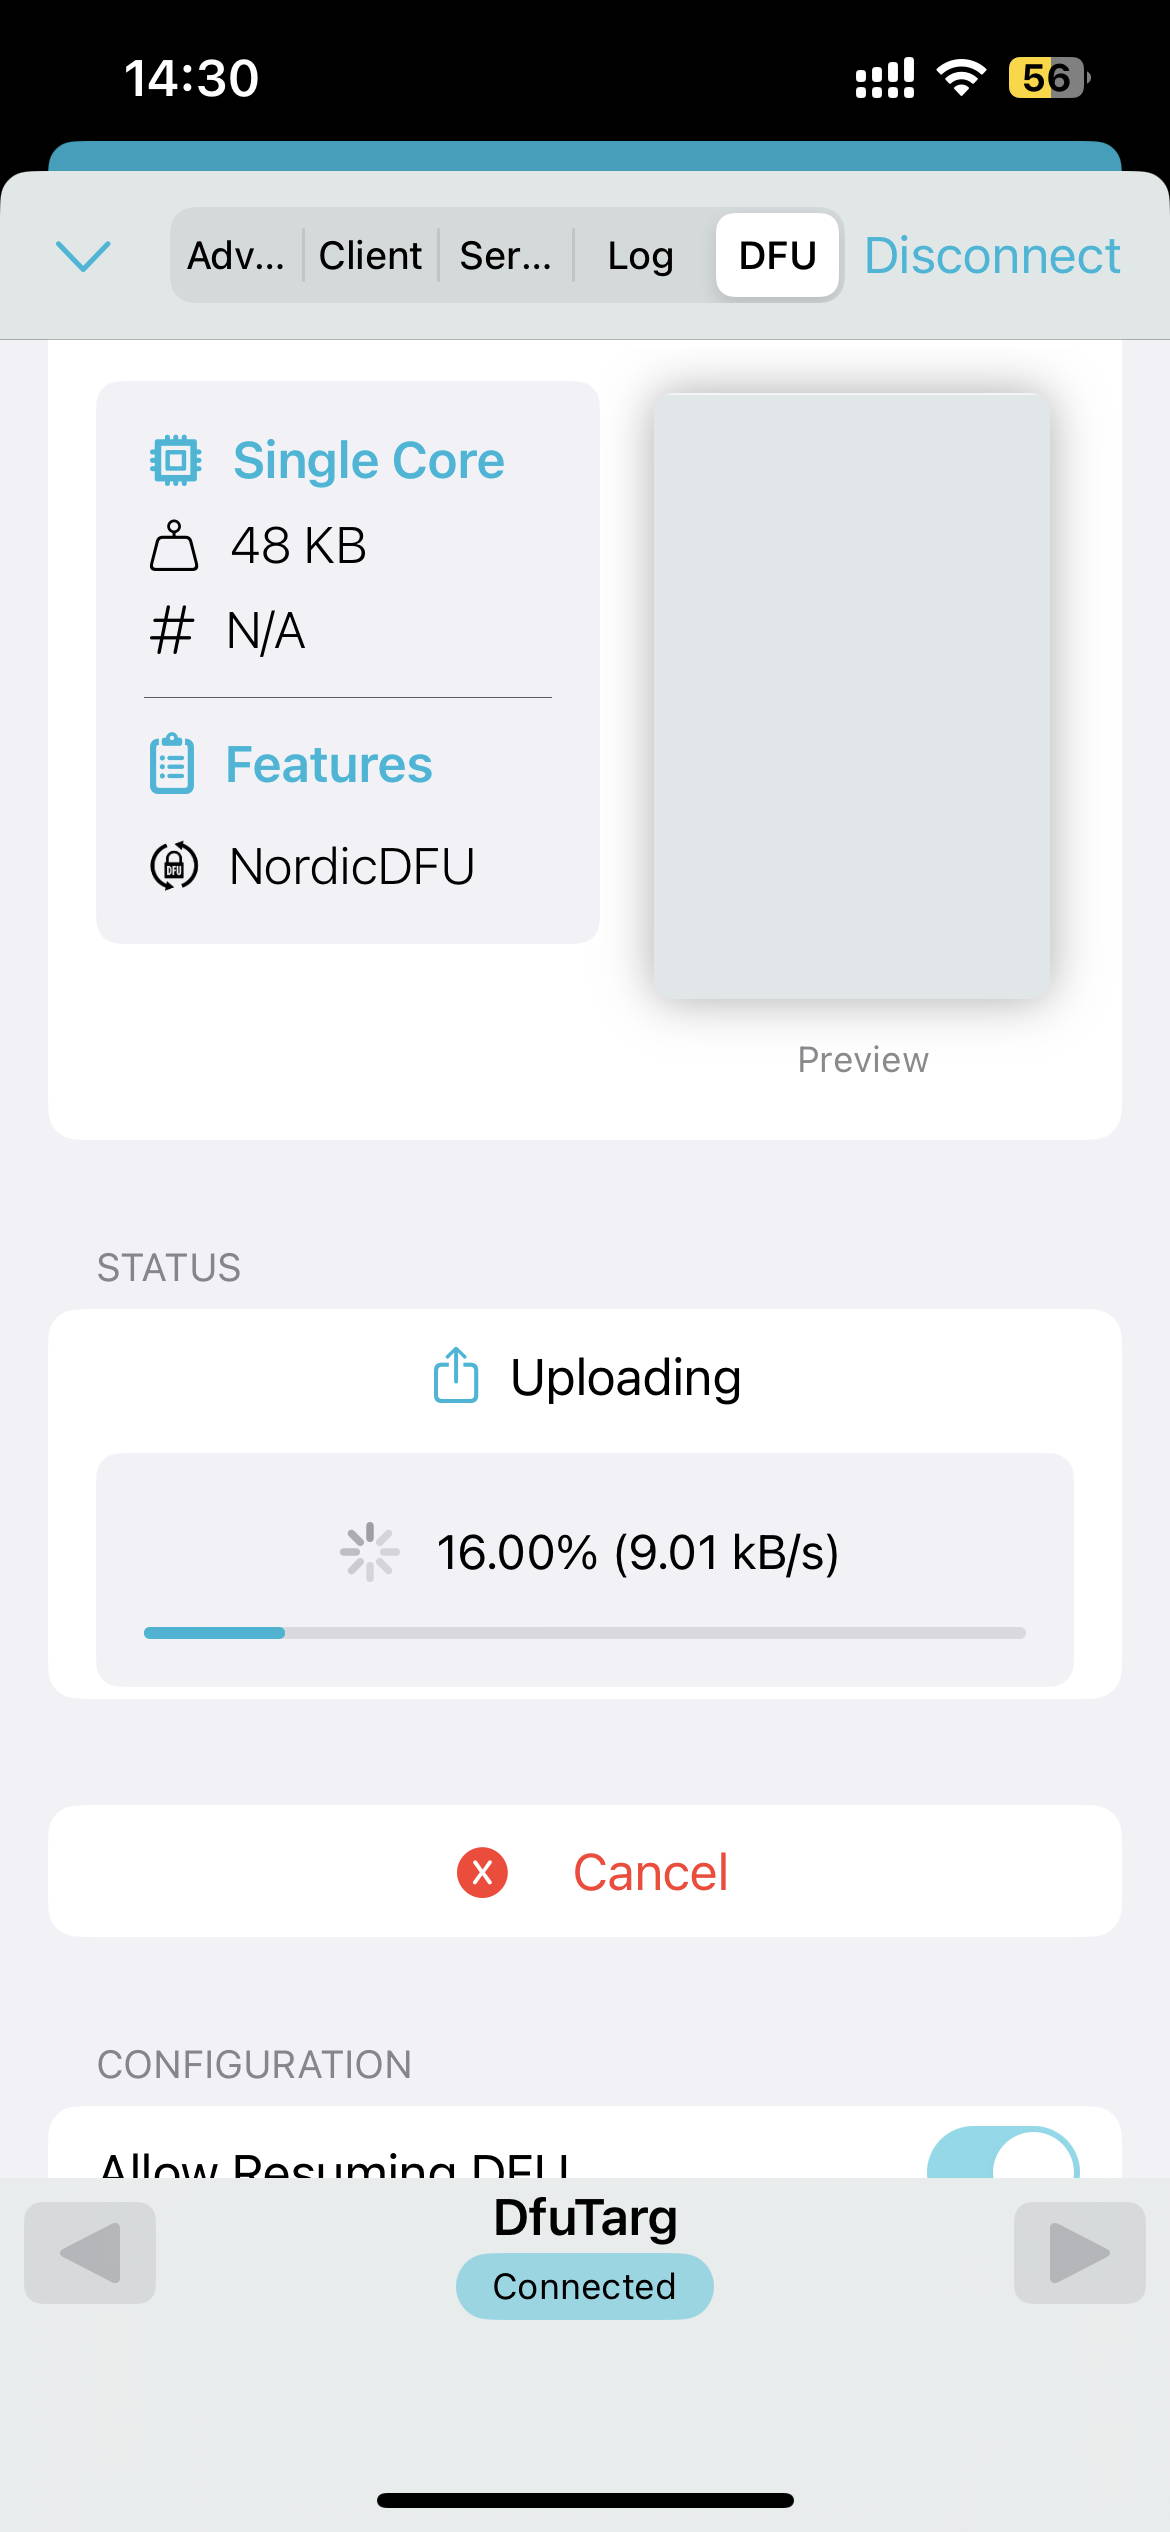
Power the keyboard through the wired mode, make sure the connection mode switch is set to the ‘WIRED’. Press FN+[ to restore the keyboard to factory Settings while refresh the nRF connect page on the phone, you can try refreshing several times until a device named "DfuTarg" is detected.
通过有线模式为键盘供电,确保连接模式开关设置为“WIRED”。按下 FN+[ 恢复键盘出厂设置,同时刷新手机上的 nRF connect 页面,可以尝试多次刷新直到检测到名为 "DfuTarg" 的设备。
On your phone, tap the connect button next to the device name to connect the phone to the DfuTarg device, once the connection is successful, the interface of nRF Connect will refresh to look like the following:
在您的手机上,点击设备名称旁的连接按钮,将手机连接到DfuTarg设备,连接成功后,nRF Connect的界面将刷新为如下所示:
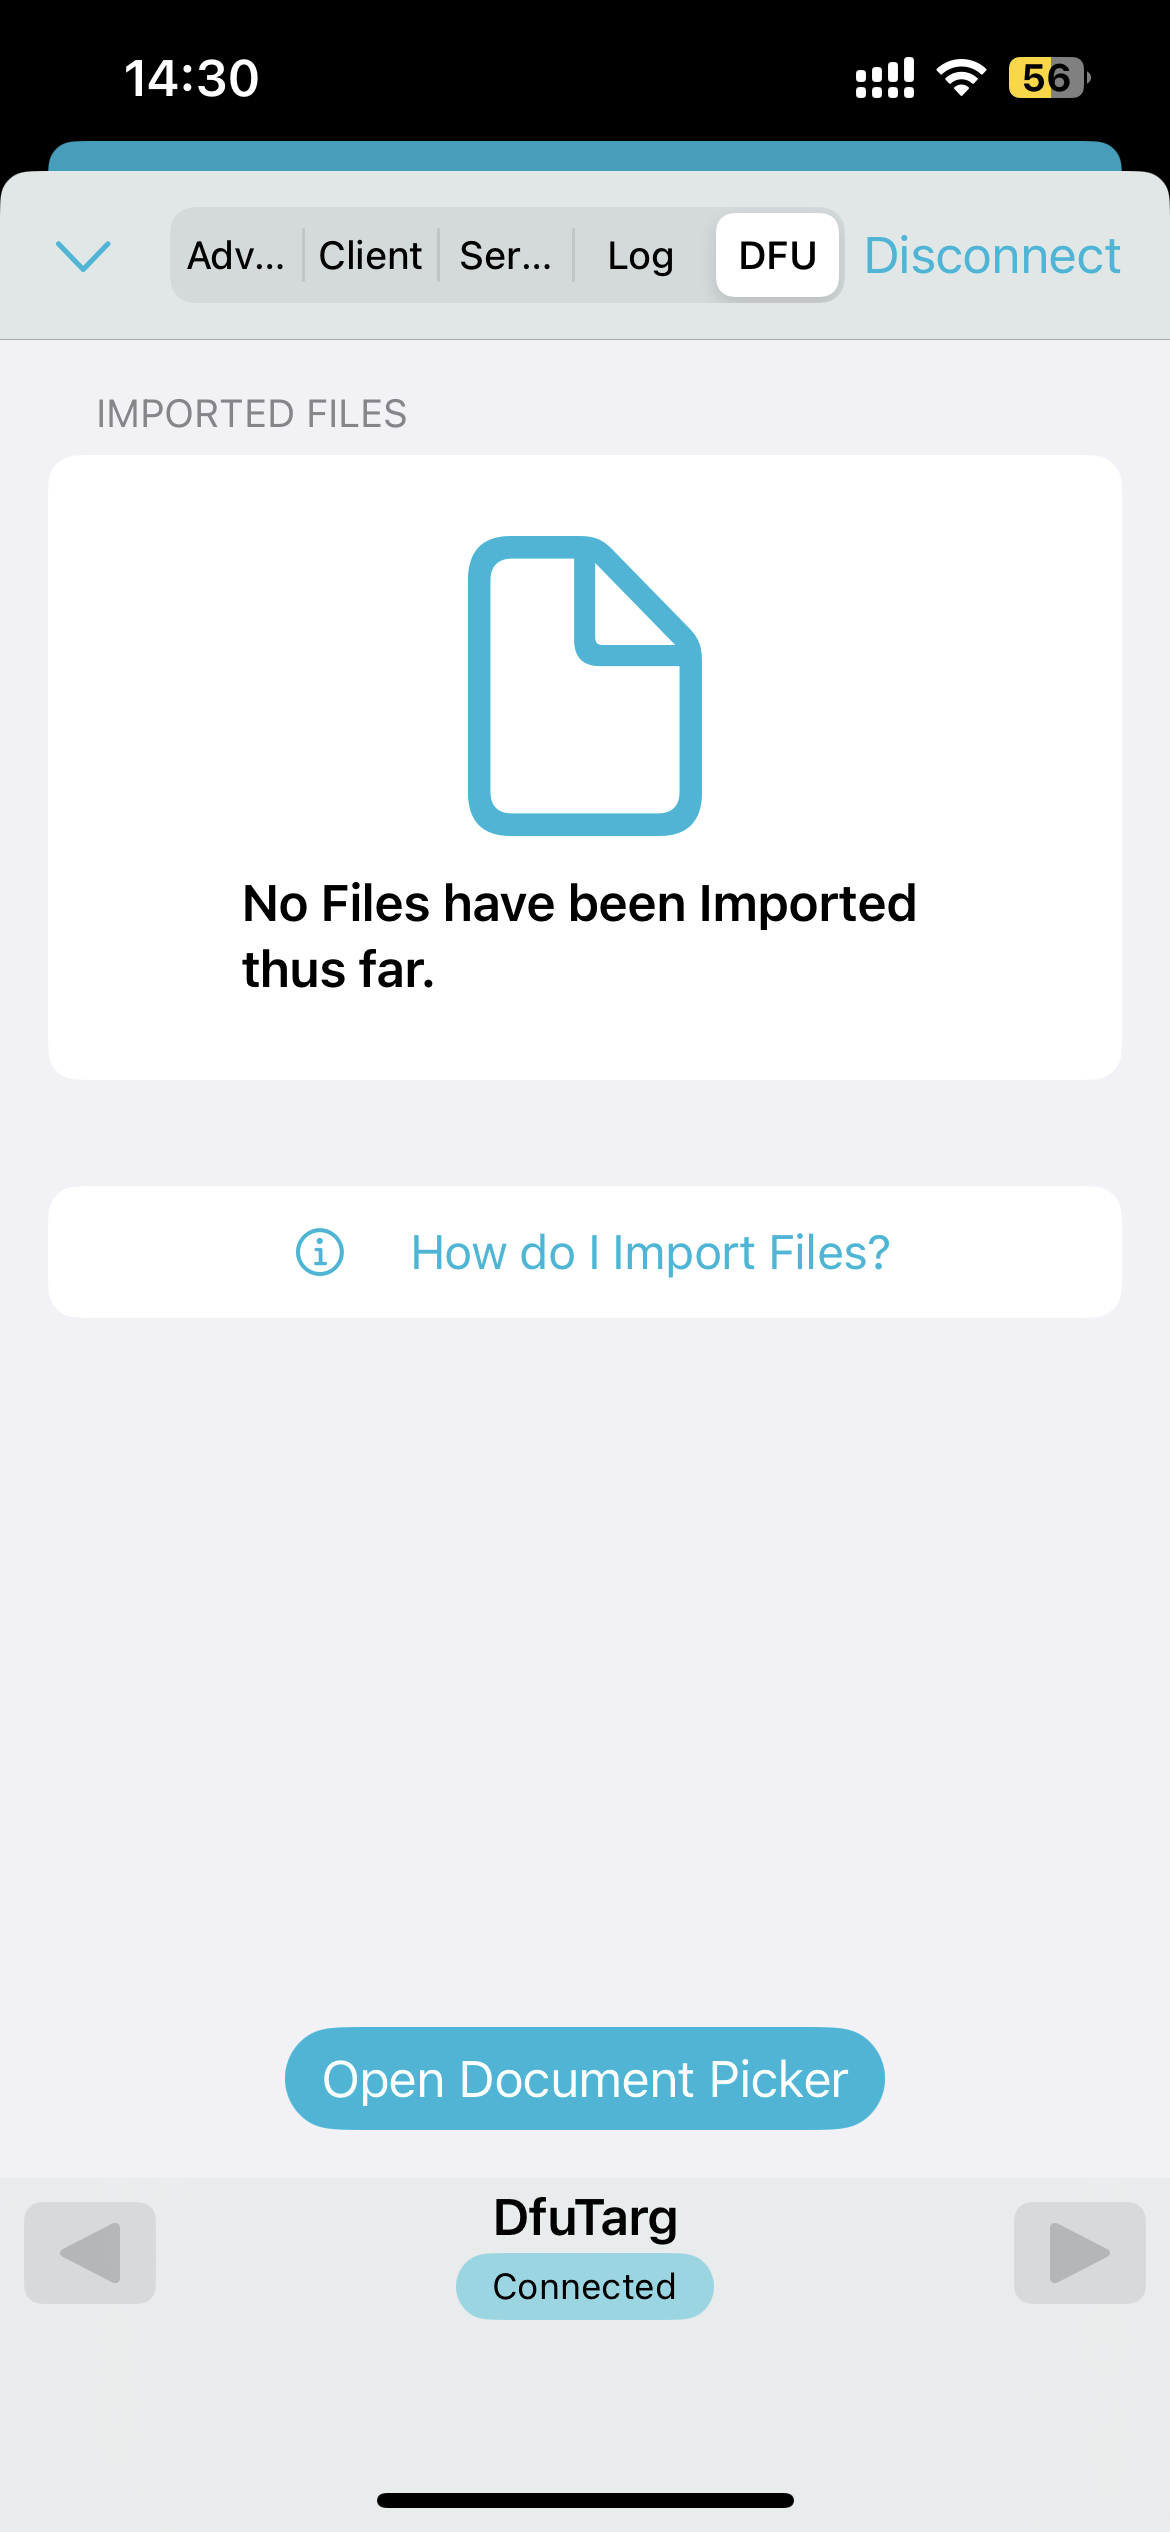
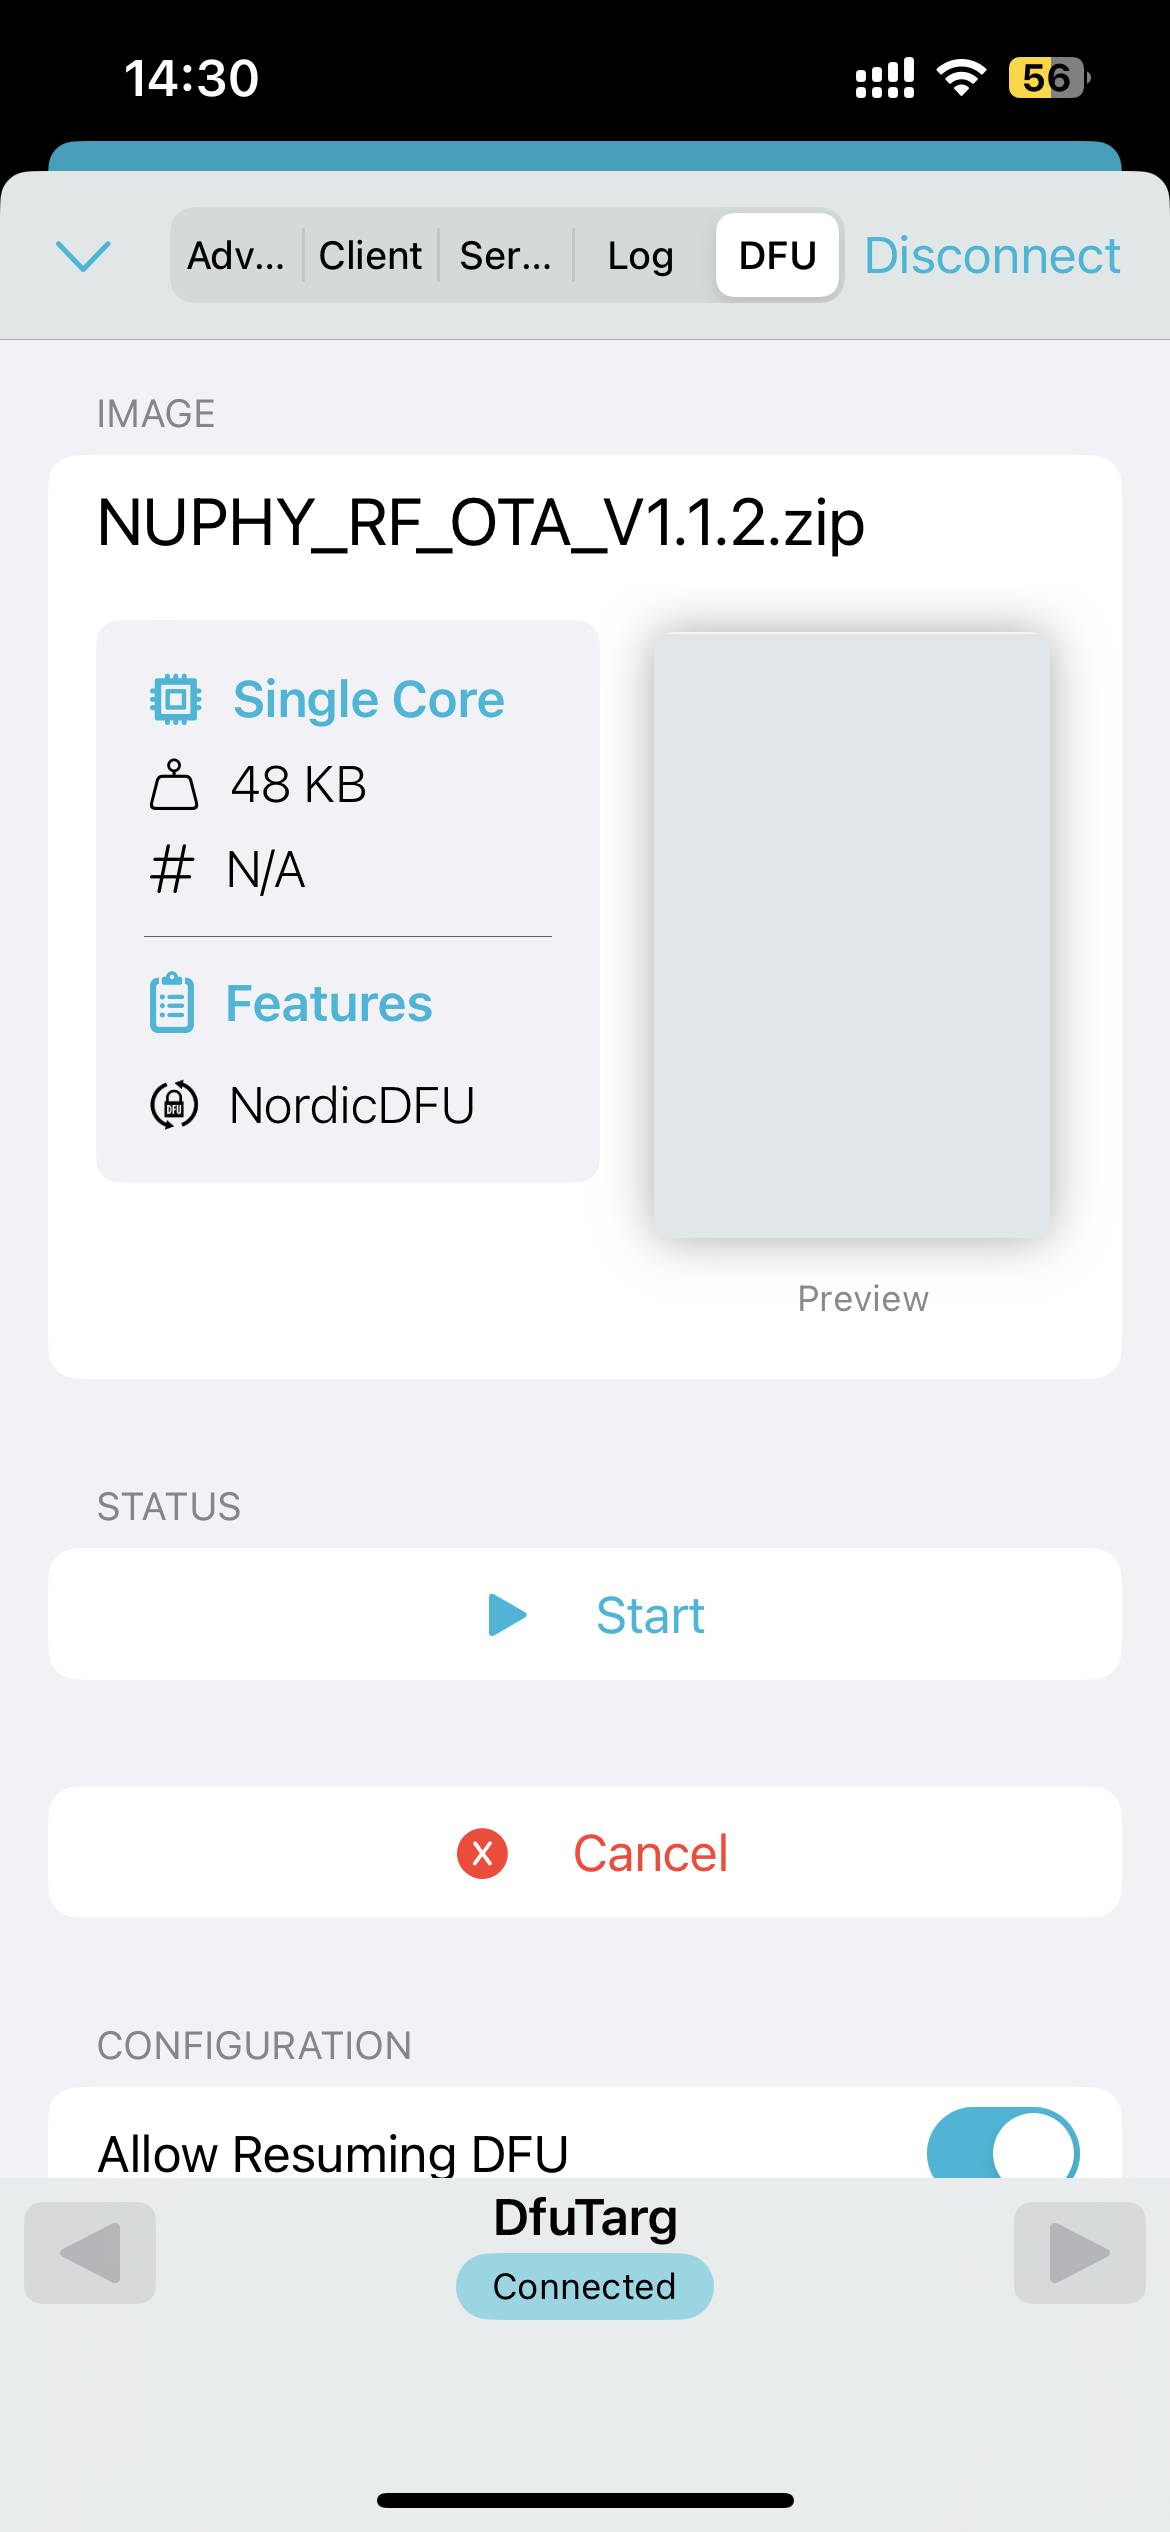
Tap the ‘Open Document Picker’ button, locate the NUPHY_RF_OTA_Vx.x.x.zip file saved in step 1, once the file is loaded, you will be shown the following screen:
点击“打开文档选择器”按钮,找到步骤1中保存的NUPHY_RF_OTA_Vx.x.x.zip文件,文件加载完成后,将显示以下界面:
Tap ‘Start’ to initiate the firmware flashing process once you confirm the firmware selected is correct.
确认所选固件无误后,点击“开始”以启动固件刷写过程。
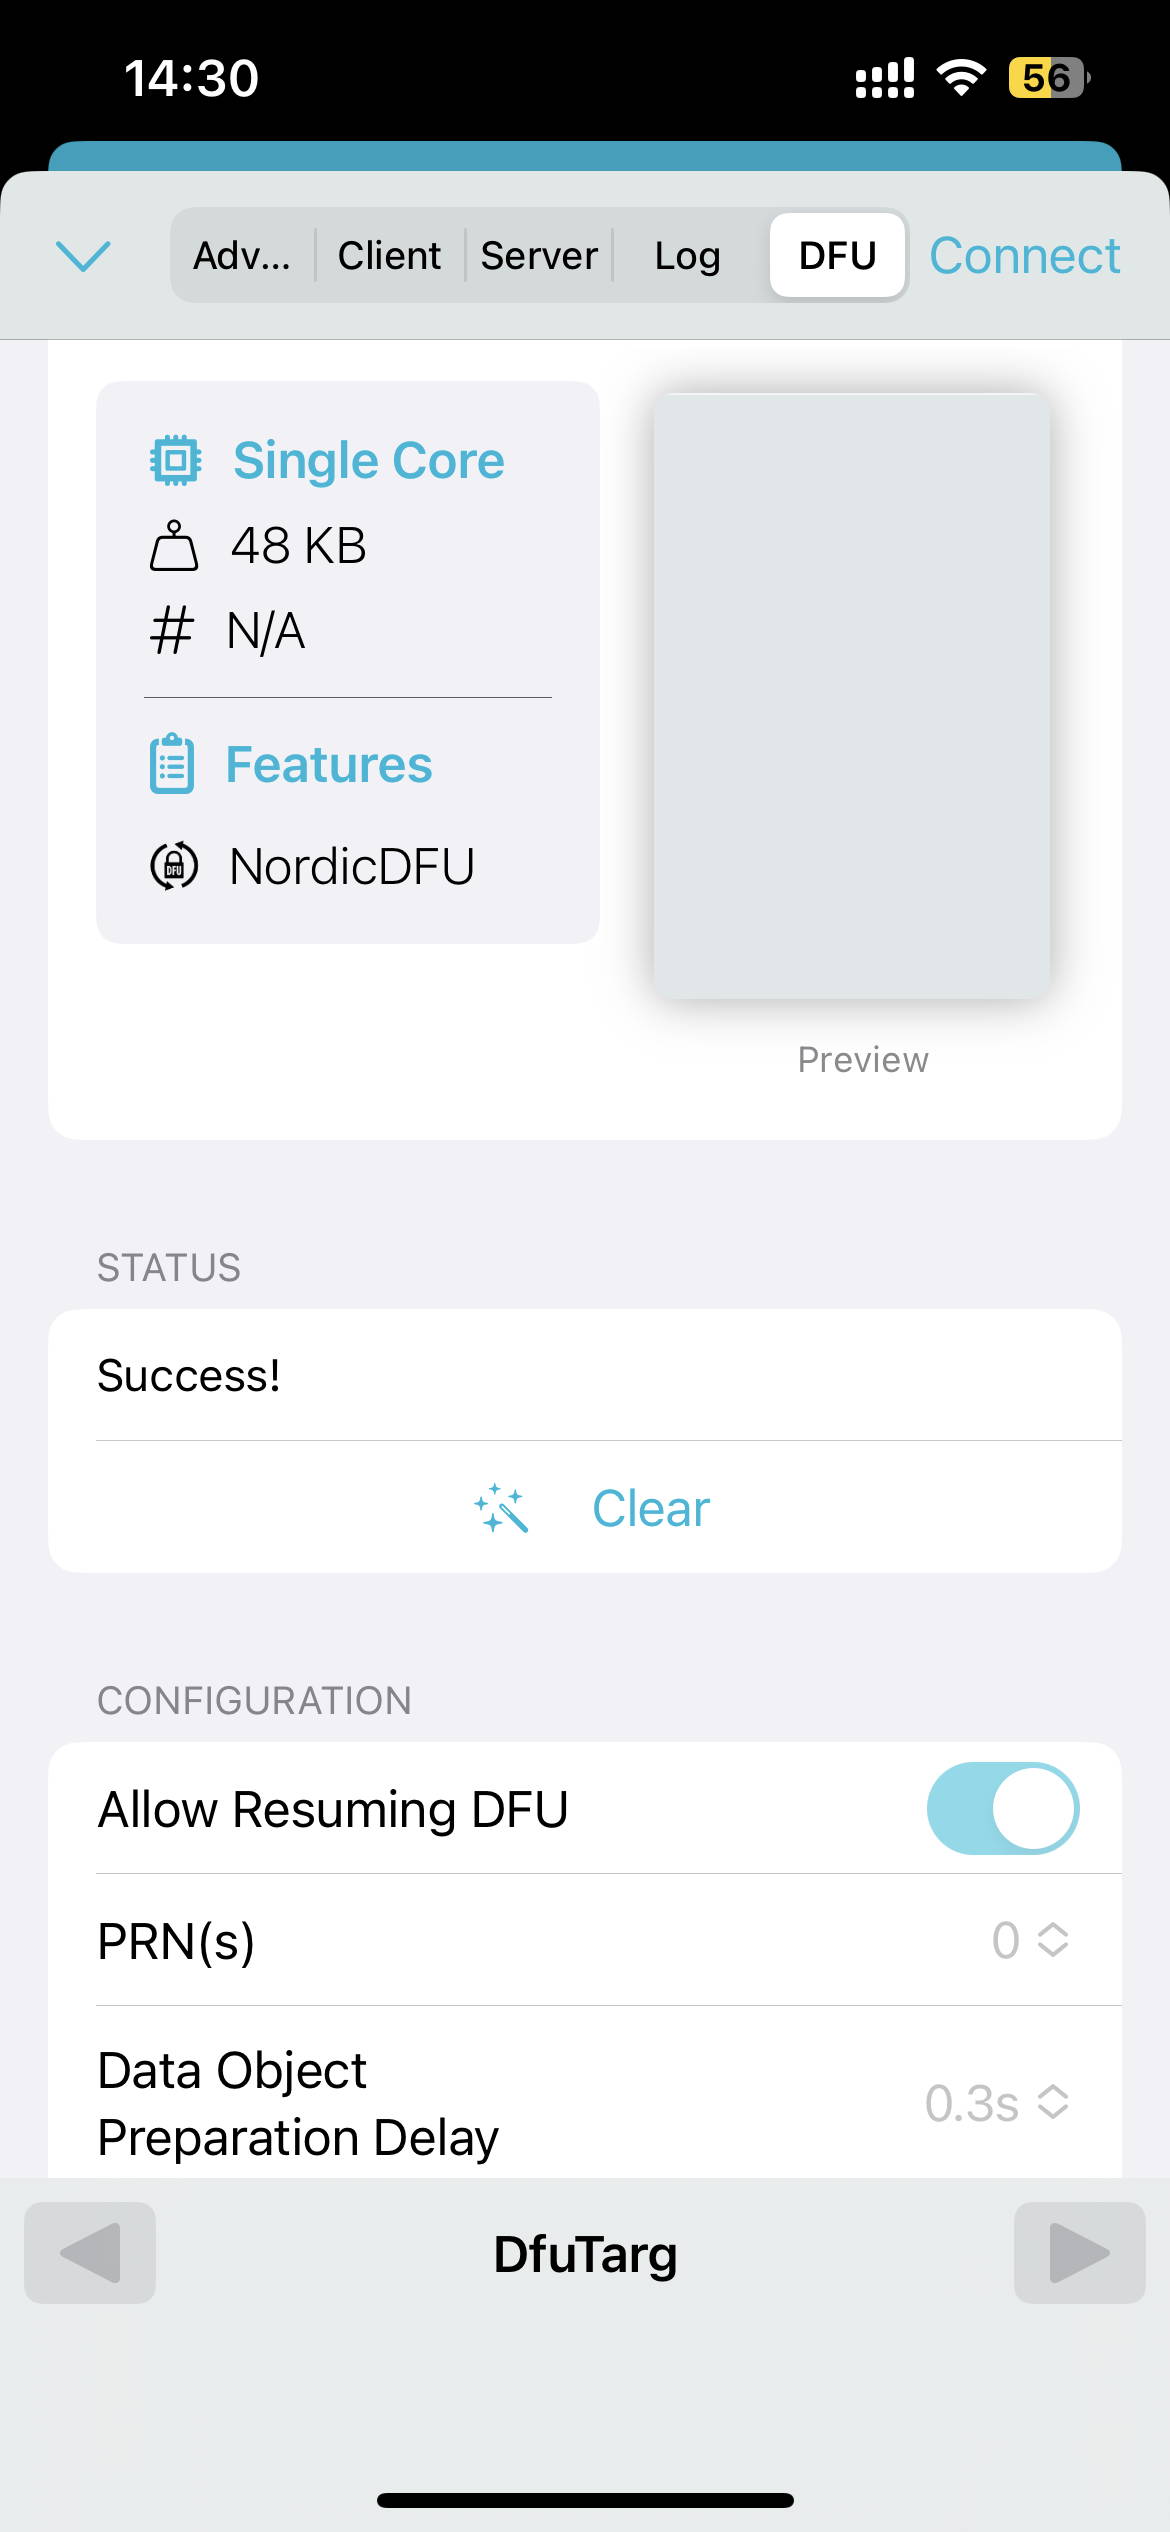
Do not exit the application until the progress bar reaches 100% and a success message is displayed, and keep the keyboard powered on.
在进度条达到100%并显示成功消息之前,请勿退出应用程序,并保持键盘通电。
Power off and on the keyboard again to complete the upgrade.
关闭键盘电源后重新开启以完成升级。即将开关拨动到OFF。
刷写接收器固件
接收器是最简单的,将接收器插入主机,下载应用程序后,执行更新即可。
Dongle upgrade operation instructions
Connect the Dongle to the computer.
将2.4G接收器连接到电脑。
Download the relevant installation package from here, make sure to select the newest version for your model.
从这里下载相关的安装包,确保选择适合您型号的最新版本。
Find and extract the file dongle_52820_upgrade_vx.x.x.exe from the installation package, or in case you are upgrading on macOS, unzip the NRF52820_Dongle_update_CS80D4_XXXXXXXX file from dongle_mac_52820_upgrade_vx.x.x.zip.
在安装包中找到并解压文件 dongle_52820_upgrade_vx.x.x.exe,或者如果您是在 macOS 上升级,请从 dongle_mac_52820_upgrade_vx.x.x.zip 中解压 NRF52820_Dongle_update_CS80D4_XXXXXXXX 文件。
Double click on the upgrader executable to start the upgrading process. Under Mac OS, you need to unblock the app by going to ‘System Preference’ within the Apple menu at the upper left corner, then choose Security & Privacy, click the lock icon at the left corner of the window, authenticate with your Apple ID, then click ‘Open Anyway’ to unblock.
双击升级程序可执行文件以开始升级过程。在 Mac OS 下,您需要通过点击左上角苹果菜单中的“系统偏好设置”,然后选择“安全性与隐私”,点击窗口左下角的锁形图标,用您的 Apple ID 进行认证,再点击“仍要打开”以解除阻止。
Click the ‘Start’ button in the upgrade window, a progress bar will appear, wait for the progress bar to reach 100%, the status text within the window will change from ‘Upgrading’ to ‘Upgrade completed’.
点击升级窗口中的“开始”按钮,进度条将出现,等待进度条达到100%,窗口内的状态文本将从“正在升级”变为“升级完成”。
